Shoyu Chicken

Shoyu Chicken is a delicious easy way to feed your family or a really large group.  One of our house favorites.

I didn’t get a whole lot of pictures for this, but wanted to get it posted anyway.  I’ll take more later. ;o)

Here’s what you’ll need:  5 lbs boneless, skinless THIGHS (I get these at costco in a 5lb package), 1 C + of Aloha Shoyu, 1 C + Brown Sugar, a thumb size portion of fresh ginger, fresh garlic (0ptional).  Aloha Shoyu is basically a lighter soy sauce.  You can find it at Walgreen’s or Long’s Drugs.  If you can’t find it, you can either use a light soy sauce or you can use a regular soy sauce and add some water to it.  I don’t mind it with the full strength soy sauce either.  I’ve done it all ways.  It’s all good!

Mix 1 C Shoyu (soy sauce) and 1 C brown sugar in your large pan.  Peel the ginger and cut it into slices.  Add to mixture.  Turn your pot on and add your chicken to the sauce.  Bring it to a boil, then drop it down to a simmer.  Cook until the chicken is done (about 1-1/2 hours).  (If you’re doing a really small pot and the chicken isn’t frozen, it only takes about 20 minutes.)  After it is cooked, you may see some floaters in it from the chicken juice.  If this bothers you or you are serving it to a group and you don’t want anyone freaking out, then take the chicken out of the pot and strain the liquid.  Pour it all back over the chicken.  Whether you strain it or not, then add some additional shoyu and brown sugar (about 1/4-1/2 C of each).  It will be ready to serve.

If you are cooking for a large group, it is easier to cook this in your soup pots, then pour it into your roasting ovens unless you can put it into your roasters and let it cook for a couple of hours or more.  I did a big batch in the roaster and it didn’t cook fast enough, so I took it out and cooked it in batches.

Super yummy served over rice with the sauce!

If you’re doing  a small batch just for your family, you can also add some  veggies with it.  The sauce makes it like a teriyaki bowl!


Kalua Pork

Kalua Pork has to be one of my most favorite recipes for feeding a large group.  I love it for my family, too, but the expense and ease of it make it one of the best meals for those large gatherings of people.  Here’s what you’ll need:
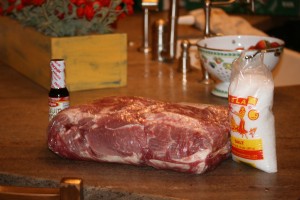
Pork Shoulder Roast about 12-15 lbs.  (I get mine at Costco), Aloha salt (can usually get it at Walgreens or Longs Drugs), and liquid smoke.  Yep….. three things!  You’re liking this already aren’t you?  (If you can’t find Aloha salt, don’t panic,  just substitute kosher.)

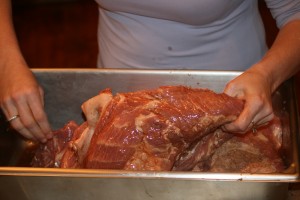
Pour your liquid smoke on your roast and massage it into the roast.  You will flip and turn your roast and pour a little more.  You will use about a 1/2 a bottle per 12-15 lb roast.  So pour and rub it in until you have the whole roast covered well.

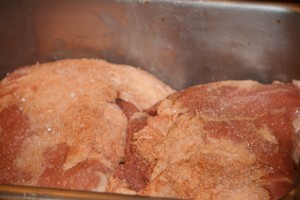
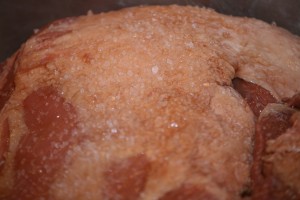
Then do the same thing with your salt.  Sprinkle it on and rub it in.  You will use about a 1/2 a cup for this large roast.  I know it sounds like a lot, but trust me. ;o)  Can you see the salt on there all massaged in?

Here’s an up-close view of the salt and smoke all rubbed in.  Now to cook it, you can just put it in your crock pot for 11 hours on low.  It is important to cook it slow and low.  The meat will just fall apart!

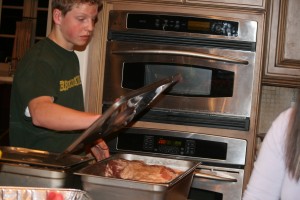
When I shot these pictures, we were doing my son’s Eagle Scout Fundraiser and had a lot of these roasts to cook, so we had about 2-3 of these roasts in these big pans and put lids on them and cooked them all night in the oven.  If you zoom in, you can see we had the oven set on 200 and let them cook all night.  I’ve also used my roasting ovens.  If you want to put them in the roaster, then wrap the meat in tinfoil, put it in the roaster and pour water to half way up the meat and set it on 200 and let it cook all night or all day, too.  Then you can slip the meat out of the tinfoil.  If you’re using the roaster, you will have to check it periodically to make sure that that the water doesn’t totally evaporate.  You may need to add some.  The advantage is that if you cook it in the roaster, then you can just shred it right in there.  I use it when I have a couple of roasts to cook and am serving it and need to keep it warm.  The crock pot works best if you have a small 5 lb roast you are feeding your family with.

After the meat is done cooking, just take your forks and shred it.  If you’d like to extend the meat a little bit or do it real Hawaiian Style, then throw some cut up cabbage in it after you shred it and let it cook a few minutes longer.  Yummy either way!!

I forgot to get pictures of the end result.  It was a big day. ;o)

Ham Roll Ups

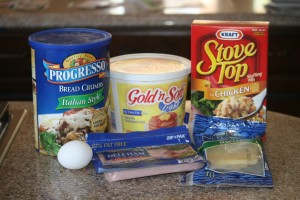
I love ham roll ups.  They are easy to make and have great flavor.  That is a good combination for me.   Here’s the cast of characters:

The first thing you are going to do is make the stuffing according to the package directions.

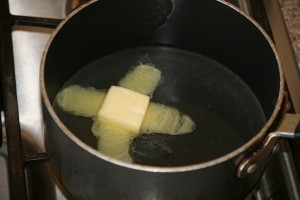
Melt the butter in the water.

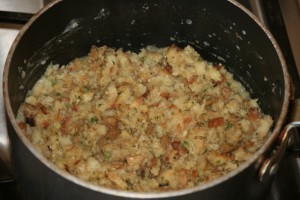
Add the stuffing.

Put on the lid and let it steam.

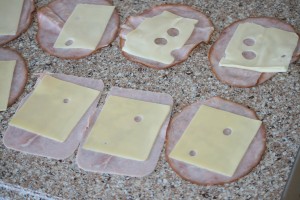
Then take your ham and put the swiss cheese slices on top.  You can use any kind of deli ham for this.  You can see I have a couple of different varieties here.

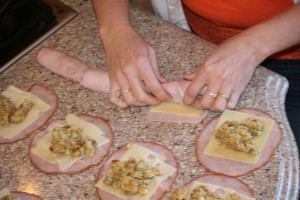
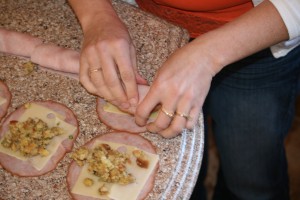
Put a heaping tablespoon of stuffing in the center.

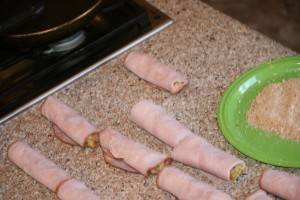
Then roll them up and secure them with a toothpick.  *Side note here:  If you make these earlier in the day, you can stack them on a plate and cover them with saran wrap and keep them in the fridge until you are ready for dinner.  If you do that, they “set up” so that you can really take the toothpick out of them, which is kind of nice.  If you are cooking them immediately, keep the toothpick in so they don’t unravel.   (Evidently I did not put toothpicks in these– could have been out, or just trying to see if it would work with out them. I test rules like that.) ;o)

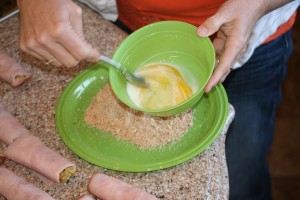
When you have them all rolled, put your breadcrumbs on a plate.

Then make your egg wash with egg and milk.

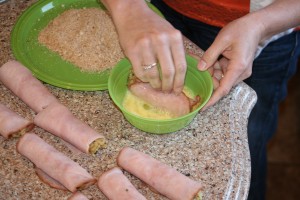
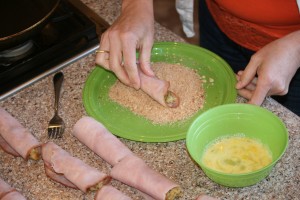
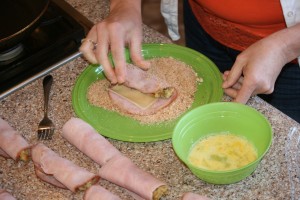
Dip the ham rolls in the egg,

and then into the bread crumbs.

And here’s why you use the toothpicks.  Don’t be a rebel like me! ;o)

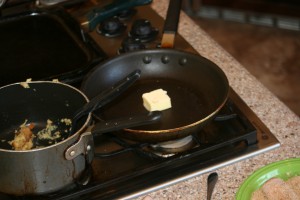
Melt your butter in a pan (I do prefer real butter to the other stuff you saw in the picture.)

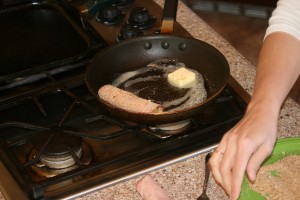
and place the ham roll ups seam side down in the pan.  This seals them and keeps them from popping open.

Load your pan up.  Then turn them after a few minutes, browning them on all sides.  It does not take too long for them to brown up and the cheese to melt.

YUMMY!  These don’t look quite as good as some of my others.  But they still taste great!!  If you’re one of those picture perfect cookers, this is a great little meal idea to use when you have to take dinner into someone.


Angie’s Chicken (The Best Chicken ever)

I call this Angie’s Chicken because after I had had one of my babies, this dear neighbor named Angie brought a pan of this to my family.  It was all I could do to not eat the whole thing by myself.   Serious.   Some of you may relate to the ravenous appetite you get after having given birth.  I would first drink about 25 gallons of juice in the first day or two, then the appetite would kick in.

Needless to say, this chicken hit the spot and is probably the favorite meal of the whole family.  It is one of the two items I can only eat as leftovers.  It is the one that I serve when we have company.  It is the BEST!  I’m telling you– the BEST!

And it’s EASY.  Which adds to the bestness of it!

Here’s what you’ll need:

sm Angies Chicken 019

Chicken, butter, milk, eggs, flour, lemon juice, nutmeg, salt, pepper, bread crumbs (why aren’t they in the picture?  I don’t know.)

Now you can either pound your chicken down or not.  I like to pound mine down for a couple of reasons.  1.  It makes your chicken cook more evenly when it is all the same thickness.  2.  Since my first pregnancy where I couldn’t even look at or think of the word “chicken” without getting sick, I now do so much better when the chicken is in thinner portions than in big chunks.  It’s just what happens.  Those of you who have been pregnant and couldn’t eat, smell or look at certain things will understand me here.  So I like to pound my chicken, unless I’m in a mass hurry.

Here’s the best way I’ve found to pound chicken.

sm Angies Chicken 004

Place your chicken in a ziploc bag.  You can use the quart size.  I was out and just had gallon.

Start pounding at the smallest/thinnest portion of your chicken, then work your way to the thicker portions, pounding until you get a uniform thickness like this:

sm Angies Chicken 005

This will make the portions very large, so I cut them down into serving size portions.  Big eaters can take two. ;o)

sm Angies Chicken 009

See my sweet boy cutting them in half for me?  The other thing that is nice about pounding your breast is that you can get more servings out of your chicken that way.

sm Angies Chicken 010

Here’s a finished cut piece.  See how large it still is?  You can cut them even smaller if you have small kids so that they are portioned according to your family needs.  (See how versatile I am?)

sm Angies Chicken 006

Now we’re going to get our coatings ready.  First we take the eggs and crack them into a bowl.  I always add a little milk to make it go a little further.  I probably add about  1-2 tablespoons.

sm Angies Chicken 007

Here’s the breadcrumbs.  You can add a little salt and pepper to it.  You may have to add more bread crumbs depending on how many pieces of chicken you are doing.  You can also used the Italian style bread crumbs.  I use whatever I have in the house.

sm Angies Chicken 011

Start your butter melting in your pan and spread it around to cover the whole pan.

sm Angies Chicken 008

Line your coatings up next to your cooking pan.

sm Angies Chicken 012

Dip your chicken into your egg wash.  (Those are my boys hands.  He’s such good help to me!)

sm Angies Chicken 013

Then dip into your bread crumbs.

sm Angies Chicken 014

Flip it over to coat the other side.  (I’m sure this was obvious, but I was happy to be taking pictures!)

sm Angies Chicken 015

Place in your pan.  (See how impatient I am.   Didn’t even wait for the butter to melt entirely.)

sm Angies Chicken 016

Continue with remaining pieces until you have them all in the pan cooking.  (I always have two pans going to feed our bunch.)

sm Angies Chicken 017

Once they are browned on the first side and you can see the sides of them turning white, flip them over to finish cooking them.  It really doesn’t take too long for them to cook through, maybe 5-7 minutes on each side.  That is if they are pounded down.  If you don’t want pound them, just make sure they are cooked all the way through before you remove them from the pan.  Speaking of which…..

sm Angies Chicken 018

When they are cooked through, take them out of the pan and place them on a plate while you make the sauce.

sm Angies Chicken 020

In the same pan, (don’t you love not having to mess up more dishes?!), melt another 6 tablespoons of butter.  Stir and  loosen up the bits on the bottom.

sm Angies Chicken 021

Add your flour to the pan and stir in.  It will kind of foam up and start to thicken.

sm Angies Chicken 022

Then add your milk and cook and stir until it thickens.  Only takes a minute or two.

sm Angies Chicken 023

Add your lemon juice and stir some more.  If you like a little more tangy and lemony flavor, I recommend using the juice of half a real lemon.  If you like it a little more mild, use the 2 teaspoons of bottle lemon juice.  They are both good.  I may be leaning to the fresh juice a little more now, though. I’ve also used lemon essential oil, too. It has good flavor. Start with 3 drops for mild flavor, 4-5 for stronger lemon flavor.

sm Angies Chicken 024

Sprinkle on your nutmeg.  See how thick it gets?  I have to turn my heat down at this point, if not sooner, to keep it from getting too thick.

sm Angies Chicken 025

You have a choice here.  You can be fancy and place the chicken on a serving dish or on individual plates and pour the sauce over it.  Or you can do what I do…..Place your chicken back in the pan with the sauce.

sm Angies Chicken 026

Then flip them over so they are coated nicely with the sauce.  I like them covered in sauce.  Sauce = happiness and joy and yummy in my tummy!

They are ready to serve at this point, or you can keep them on low and warm until ready to serve.

sm Angies Chicken 027

Trust me when I say “eet’s thee best!  I looovee eet!” (In your best Nacho voice.)  We had twice baked potatoes (yet again) and Doodle Bug’s Creamed Corn.  Hey!  Why didn’t I get pictures of that??  Okay, I promise, I’ll get that one up.  You’ll love it.  It’s her own creation and not like any creamed corn you’ve ever had!

Enjoy!!

BBQ Pork Ribs

This is an easy and great meal.  Perfect in the summer or winter. What you’ll need: 1-2 Racks of ribs, kosher salt, pepper, garlic powder, ketchup, liquid smoke, and brown sugar.

ribs sm 2

Get your large cookie sheet and a piece of tinfoil long enough to wrap around and seal the ribs.  Make sure the tinfoil is really heavy duty.  I get mine at Costco.  If you do not have the really heavy stuff, you will probably need to double wrap it. I also got these ribs at Costco.  They are the pork ribs and have two racks in a package. I place them on the tinfoil to keep the mess confined to one spot.

ribs sm 3

Take the ribs out of the package and sprinkle both sides generously with kosher salt, pepper, and garlic powder.  I tried to show you the amount sprinkled on, but it soaked in quick.  Just get plenty on there.  Pork needs the seasoning to be good.

 ribs sm4

ribs sm5

Kind of stack them back up….

ribs sm6

Then wrap them up.   Go ahead and wear your sweats.  I’ll feel better.

ribs sm 7

Fold it over this way….

ribs sm 8

Add a piece of tinfoil if your’s is not long enough….

ribs sm 9

Then seal up the sides….
ribs sm 10

Now put them in your 300 degree oven  to cook for 3 hours.

ribs sm 11

Make your BBQ sauce by mixing ketchup, brown sugar, and liquid smoke.

Before you get ready to serve theribs, take them out to your grill.  It was raining, so I didn’t dare go out with my camera.  So use your imagination here until I cook them again and add these pictures.

Take the whole pan to the grill and unwrap it.  Take your rack of ribs and place them meaty side down first and let them cook for about 5 minutes.  Flip them over and slather on your BBQ sauce and let them sit for another 5 minutes.

ribs sm1

When they are done cooking, you can set them right back on your tinfoil pan and bring them back in the house.  Ready to eat!!  YUM!  Keep some extra BBQ sauce on had just in case you need a little more while eating.

BBQ Ribs

1-2 Racks of ribs Salt, Pepper, Garlic Powder

Generously season both sides of ribs with salt, pepper, and garlic powder.  Wrap in tinfoil and bake on cookie sheet in 300 degree oven for 3 hours.

Remove to grill and brown meat side down for 5 minutes.  Turn over and cover with BBQ sauce.  Grill 5 more minutes.  Slice between bones.

BBQ Sauce

1 C Ketchup

1 C Brown Sugar

1 t Liquid Smoke (Can add more if you’d like)

Here is another Sauce recipe from my friend, Jill, who showed me how to do these ribs.  She said that she makes her sauce using equal portions of ketchup, honey, and brown sugar.

For example:

1 C Ketchup

1 C Brown Sugar

1 C Honey

Try them out and see which one you like best and let me know!

Dutch Oven (or crock pot) Ribs

I had team night at my house.  It happens often, but was our first for Shotgun.  Knowing I’d have a house full of hungry boys, I tried to think of something hearty and filling.  Ribs were on sale, so that decided it for me!

You can do these in the crock pot just as easy.  I just wanted to use the dutch oven and cook them outside on the grill to keep my messes down since I was making rolls, too.

What you’ll need:

boneless ribs, salt, pepper, garlic powder if wanted, BBQ sauce

Since I wanted these to taste a little rustic and campfire-y, I started at the grill.  You can brown them on your stove top if you’d like.  Just brown them.  As you can see it was nice and sunny after all our rain, so I went for the good stuff!  Besides, I hate washing pans and cleaning up splatters!

smDutch oven ribs 001

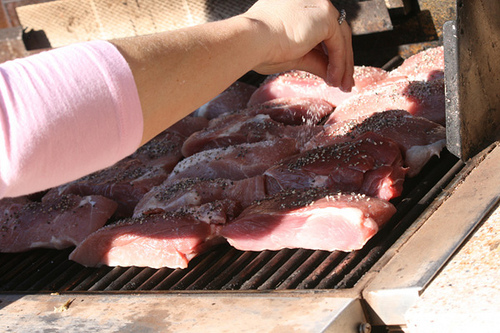
I put the ribs on a hot grill and sprinkled them with kosher salt and pepper.  I like kosher salt!  It has such better flavor!

smDutch oven ribs 002

Put plenty on them.  You can add garlic powder, too, but I forgot.

smDutch oven ribs 003

Flip them over and season them on that side, too. I’m not sure if my grill was not hot enough or if I was impatient. You can brown them more than this.

smDutch oven ribs 004

Once their seared, put them in your dutch oven or your crock pot, whichever you prefer.

smDutch oven ribs 005

Stack ’em on in there.  Then put the lid on them and set them back on your grill with the temperature turned to low.  If you have a thermometer on your grill, I kept the temperature at 300 and cooked them for 3 hours.  If you are crock-potting, then turn them on high for 3-4 hours or low for 5-6 depending on your time.

smDutch oven ribs 008

After cooking for 3 hours, drain off the liquid.  It took two of us to drain, so there was no picture taking of draining the dutch ovens, but here is the liquid.  Now you can save this and freeze it or refrigerate it if you are going to use it soon for soups or gravies.

smDutch oven ribs 006

After the liquid is drained off, then pour your BBQ sauce over the top.  You can use your favorite or make a homemade one.  (I’ll post one below).  Then put the lid on and put it back on to cook for another 30 minutes or until you are ready to eat.

smDutch oven ribs 007

Looking good already, huh?  This picture will have to suffice for the final one because once we brought them in and had prayer and lined them up, I forgot to take a picture.

smteam night 001

But here is a picture of some really cute boys eating their dinner.

smteam night 002

There you have it.  Two dutch ovens full of ribs, baked potato, green salad, Herbed Oatmeal Pan Bread and koolaid.  It just doesn’t get any better than this!!

Oh yeah, with the team’s 14 + my 8 + the 1 who dropped in= around 23 people.  We had just enough left for Mr. Perfect to have a couple of lunches made which left 1-2 ribs.  I hope they were all full!