Easy Breakfast Pizza/Casserole

This is probably my kids favorite breakfast. They love it. I love it, too. It is easy to prepare and tastes yummmy! Here’s what you’ll need:

Breakfast Pizza 001

Cresent rolls, sausage, eggs, milk, cheese, & pepper. (I threw salt in the picture, but you don’t need it.)
First, preheat your oven to 400 so it’s heating up while you get it all ready.

Breakfast Pizza 002

Then brown your sausage. If you heat your pan first, it goes a little faster.

Breakfast Pizza 003

While the sausage is browning, unroll the cresent rolls into a 9×13 pan. You don’t neccessarily have to spray the pan but can if it makes you feel better.

Breakfast Pizza 004
Then push the seams together and push it up the side a little bit.

Breakfast Pizza 005

Keep stirring your sausage, then put the 4 eggs into a bowl and add a little milk– about 2 T, and sprinkle in a little pepper.

Breakfast Pizza 006

When your sausge is browned, then pour it into your pan.

Breakfast Pizza 008

And spread it around even, like so.

Breakfast Pizza 009

Then pour the eggs over the top and make sure they spread evenly through the sausage and around the pan.

Breakfast Pizza 013

Then sprinkle it with cheese. I think the recipe says 1 cup, but we like a lot of cheese, so I just cover it all.

Then put it in the oven to bake for 15 minutes.
Breakfast Pizza 014

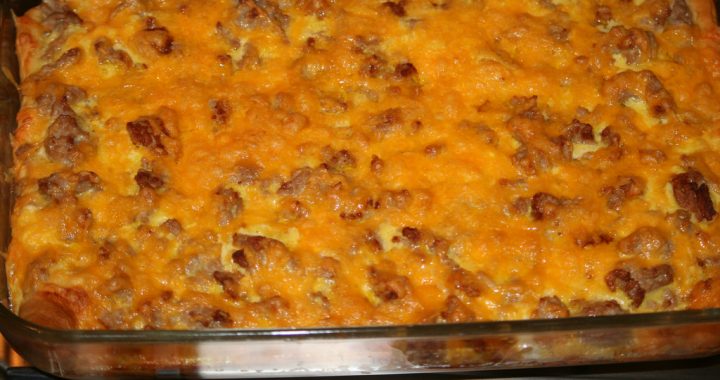
Taa Daa! There it is!! It smells yummy while it’s cooking and is even yummier to eat!! This is nice for the kids throw on a napkin and eat while running out the door. (Not that we’ve ever done that before.)

Here’s the full recipe. Hope you love it like we do!

Breakfast Pizza
1 lb. Pork Sausage, cook and drain
1 tube (8oz) refrigerated cresent rolls
4 Eggs
2 T. Milk
1/8 t. pepper
3/4 C. Shredded cheese

Unroll cresent rolls into a lightly greased 9×13 pan. Press dough ½ in up sides and seal seams. Sprinkle with browned sausage. In a bowl, beat eggs, milk and pepper pour over sausage. Sprinkle with cheese. Bake, uncovered at 400 for 15 min. or until the crust is golden brown and the cheese is melted.

Yield: 8 servings or more. It does feed 8 of us unless some are really hungry.
Ham & Cheese Omelets

I love making omelets for my family for a hearty easy breakfast.  Especially when I have a ballplayer who has a game that day.  It makes me feel like I am giving them a little bit more to help them through the day.

My picky eaters only like ham and cheese.  Personally, I love green onions and mushrooms too, but I rarely have sauteed mushrooms on hand at breakfast.  Fresh salsa or pico is something else that you can put on the top of them, too.  Be creative.  Have fun.

I neglected to get a beginning picture of ingredients.  Probably because I started cooking and then remembered…..

So what you will need:  Eggs, milk, ham cheese, salt, pepper, butter or margarine, and any other optional ingredients you would like.

Use your small omelet pan for this.  Put about 1 tablespoon of butter in your pan and turn the heat on low.  I believe that cooking it on low is key to a good omelet.  It takes a little more time, but it doesn’t turn them brown and crusty.  I HATE brown and crusty eggs!

sm Ham n cheese omlet 001

Melt your butter and turn the pan to cover it.  You want plenty in there.

sm Ham n cheese omlet 002

While your butter is melting, crack your eggs into a bowl.  I figure 2 eggs and 1/2-1 tablespoon of milk per person.  I have 6 eggs and 2-3 tablespoons of milk in this bowl.  Then whip them up.

sm Ham n cheese omlet 004

Pour the egg mixture into your pan and sprinkle with some salt and pepper.

sm Ham n cheese omlet 003

While it’s cooking, dice up your ham.  This is just some deli ham that I have diced up.  It’s easy.  That’s why I like it!

sm Ham n cheese omlet 007

Keep watching your eggs.  See how the edges are nicely cooked and it is still a little runny on the top, but you can see that it is set up pretty good even in the middle?  You can flip it now.  If you’re really good, you can loosen the edges and flip the pan.  I’ve done it.  It only works good if your egg is cooked well and if you have a lot of butter so that it can slosh around a little bit before flipping.

But really, just use a larger spatula and slide it gently under it and flip it over.

sm Ham n cheese omlet 009

Like so.  You can push that little crinkle out if it bugs you.  It bugged me, but evidently not enough to push it out.

Have your cheese handy.  I love having this on hand so I don’t have to work too hard first thing in the morning.  If you don’t have this, just grate you some up.

sm Ham n cheese omlet 010

I try to pick the half of the omelet that is thicker and will take longer to cook to put the cheese on.  That side will get a little more cooking to it when you flip half over.  (If that made sense.)

sm Ham n cheese omlet 011

Now sprinkle your ham on, and anything else if you’d like.

sm Ham n cheese omlet 006

I’m missing a picture, I guess.  Just flip the top half over the ham and cheese side.  I like to sprinkle a little more cheese on the top, just for effects and to hide anything that may bug picky children.  Scoop onto your plate.  You will notice that paper plates are the dishes of choice in our family.  This is a lovely paper plate.  Usually you will see nice plain white ones.  It’s your lucky day.

For the life of me, I cannot understand why people put ketchup on such a fine dish, but it happens in my house.  I refuse to take a picture of it.  Now if it were summer and the pico was in the fridge, Mr. Perfect would probably use that, but for now, he uses ketchup.  I blame him for teaching this aberration to my children.

Ham & Cheese Omelets

2 Eggs per person

1/2- 1 Tablespoon of milk per person

Ham

Cheese

Salt

Pepper

Optional Items:  green onions, sauteed onions, sauteed or fresh mushrooms, tomatoes, peppers, etc.

Homemade Bread Crumbs

In this day and age, we have an opportunity to live by the motto our parents and grandparents did, “Use it up, wear it out, make it due, or do without.”  Making your own bread crumbs is easy and a great way to be practical while saving money.

If you’re like my family, most of them won’t eat the crusts of the loaves of bread.  All you have to do is set them on a plate or in a bowl and let them dry out overnight.  Or you can put them in an oven and toast them for a few minutes.

The reason why I made these breadcrumbs is 1) because I had made ribbon sandwiches and we always have a lot of leftover bread that I can’t stand to just throw away, and 2) because I was out of breadcrumbs anyway.

It’s easy to do.  Just set your bread out to dry, as I mentioned above.

Bread Crumbs 002

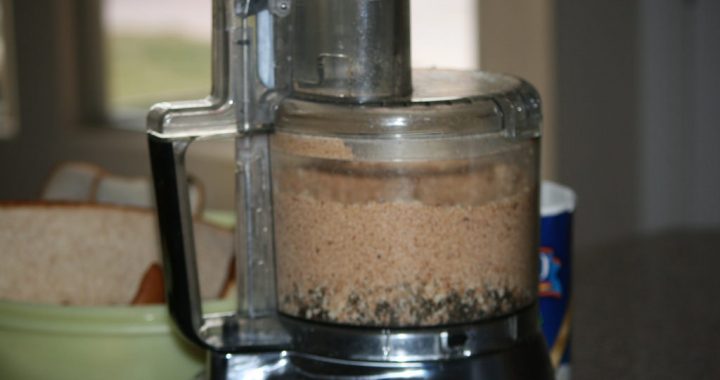
Then place them in your food processor or blender.

Bread Crumbs 1

Mix them until you have fine bread crumbs.

Bread Crumbs 3

Voila!  Easy. Store in your pantry.