This is the juicer I like.
Category: Eat
Fermented Veggies
Basic Sauerkraut
- 2 lbs shredded cabbage
- 1 T Sea Salt
Basic Kimchi
- 2 heads Napa Cabbage, chopped
- 1-4 inches fresh ginger root, peeled
- Sirachi hot sauce to desired heat
Veggie Mix
- Cabbage
- Carrots
- Zucchini
- Garlic
- Turnip
- Broccoli
- Celery
- (any veggies you like, just shred)
Fermenting experiment and Free videos on how to make fermented veggies from Nourishing Treasures
Fermenting Supplies
1 Liter-
1 liter jar 12 pack-
1 liter 6 pack-
1 liter Boss pickler-
1 liter primal pickler-
1.5 liter primal pickler-
2 liter (half gallon)-
Case of 6 2 liter–
2 liter primal pickler-
3 liter-
4 liter (gallon)-
4 liter case of 6-
Caps and ferment lids-
Glass weights-
8 wide mouth lids with fermentation tubes and stoppers-
Plastic caps with silicone seals 4 pack-
Plastic caps 16 wide mouth-
Plastic Caps 8 regular and 8 wide mouth-
Chalk tops 8 pk wide mouth—would be good for water kefir-
Cooking God’s Way Fermentation pack-

Fermenting Book-

Water & Milk Kefir
Milk and Water Kefir are great ways to build your probiotics in your gut and make some great homemade items at home.
Here is my Water Kefir Recipe
For Milk Kefir:
Put 3 Cups whole milk in quart jar and add 1 Tablespoon of “grains.” Let sit on counter or shelf for 24 hours. The curds will separate from the whey. After 24 hours, pour contents of bottle into mesh strainer and gently move spoon back and forth across strainer being careful to not smash grains. Milk kefir will drop into container/bowl. Place grains in next quart jar of milk, repeating the process. With the kefir in the bowl/container, stir to mix curds and whey. Pour milk kefir into quart jar. Put the lid and ring on with the lid upside down so it does not seal tightly, and place in fridge for use.
Tip* When washing jars, just use water or use white vinegar and/or peroxide to clean with so the soap does not leave chemicals and bacteria in jar that will kill the grains.
Natural Yeast Breads
Natural Yeast Belgium Waffles
- 1 C Starter
- 1 Egg
- 1 T Sweetener (maple syrup, molasses, honey, or organic cane sugar
- 1 T Oil (I use coconut oil)
- ¼ t Salt
- ¼ t Baking Soda dissolved in
- 2 T Milk or water or almond milk
- 1 t Vanilla
- ½ t Cinnamon (can add more if you like)
- Place all ingredients in vitamix and blend on low
Natural Yeast Recipes
Cooking Tips– Pot Holders
Fluffy Peach Jello
Fluffy Peach Jello is about the best jello dish there is. Really. It’s light. It’s fluffy. It has peaches. It is heavenly. Everyone will think you are the queen if you bring it to the party! It’s also very easy, it just takes a little planning ahead to let it set up. Here are the ingredients: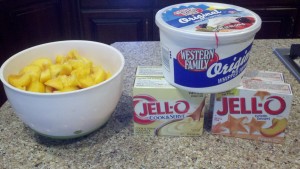
2 Large Cook and Serve Vanilla Puddings, 2 large peach jellos, 1 large container of cool whip, several cups of sliced peaches.
For some reason, I didn’t take picture of the next step. Basically, you take the cook and serve pudding and mix it with water in the amount called for on the package (only the package says to use milk and we aren’t.) Cook the pudding and water until it comes to a boil as it says on the package directions. Once you have cooked that, add your jello to it, mixing it all in.
Then pour it in a bowl and put it in the fridge to set up. Should take about 4 hours or so.
It will set up and be nice and thick. That’s just how you want it!
Then get your beaters out and start beating it until smooth. I get a little impatient sometimes and don’t get it mixed as smooth as I should. My cousin is much better at getting it nice and smooth.
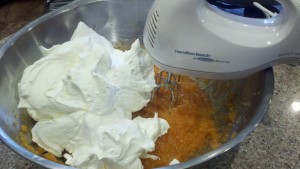
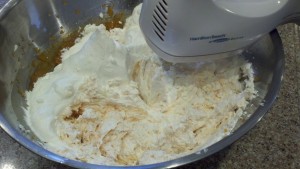
Once you’ve got it nice and smooth, add the cool whip and beat it in, as shown below.
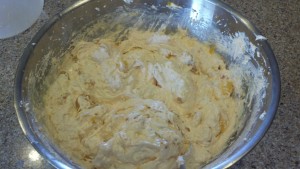
Once you’ve got it all creamy,
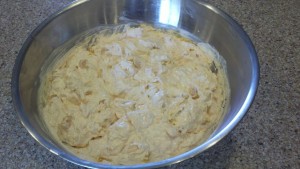
then stir in the sliced peaches. That’s it! Easy, huh?
If you’re needing to make it ahead of time, you can do it all and add the peaches last. Sometimes, I’ll mix it and put it in the fridge to set overnight, then add the cool whip and peaches just before serving. If time doesn’t permit that, you can mix the fluffy stuff, then add the peaches later. It actually lasts for a few days, but sometimes the peaches will start to brown a little.
We’ve also made this with strawberries and strawberry jello. I’ve also heard of those who have done the mandarin oranges and orange jello. I imagine pineapple could be done, too. Our family, however, likes the peach and strawberry the most.
Hope you’ll enjoy this yummy treat while the peaches are on and are so yummy!!
Fluffy Peach Jello
1 lg pkg cook and serve vanilla pudding
1 lg pkg peach jello
1 12 oz container Cool Whip
4-6 large peaches, peeled and sliced
In saucepan, prepare pudding as directed on box substituting water for the milk. When finished, add box of peach jello and stir until dissolved. Put in bowl and chill in refrigerator for 4-5 hours until set. Before serving, whip jello/pudding mixture with mixer until smooth. Add Cool Whip and blend. Stir in peaches. Serve cold.
Note: Different jello flavors and fruits can be substituted. Strawberry jello and strawberries are good, too!
Shoyu Chicken
Shoyu Chicken is a delicious easy way to feed your family or a really large group. One of our house favorites.
I didn’t get a whole lot of pictures for this, but wanted to get it posted anyway. I’ll take more later. ;o)
Here’s what you’ll need: 5 lbs boneless, skinless THIGHS (I get these at costco in a 5lb package), 1 C + of Aloha Shoyu, 1 C + Brown Sugar, a thumb size portion of fresh ginger, fresh garlic (0ptional). Aloha Shoyu is basically a lighter soy sauce. You can find it at Walgreen’s or Long’s Drugs. If you can’t find it, you can either use a light soy sauce or you can use a regular soy sauce and add some water to it. I don’t mind it with the full strength soy sauce either. I’ve done it all ways. It’s all good!
Mix 1 C Shoyu (soy sauce) and 1 C brown sugar in your large pan. Peel the ginger and cut it into slices. Add to mixture. Turn your pot on and add your chicken to the sauce. Bring it to a boil, then drop it down to a simmer. Cook until the chicken is done (about 1-1/2 hours). (If you’re doing a really small pot and the chicken isn’t frozen, it only takes about 20 minutes.) After it is cooked, you may see some floaters in it from the chicken juice. If this bothers you or you are serving it to a group and you don’t want anyone freaking out, then take the chicken out of the pot and strain the liquid. Pour it all back over the chicken. Whether you strain it or not, then add some additional shoyu and brown sugar (about 1/4-1/2 C of each). It will be ready to serve.
If you are cooking for a large group, it is easier to cook this in your soup pots, then pour it into your roasting ovens unless you can put it into your roasters and let it cook for a couple of hours or more. I did a big batch in the roaster and it didn’t cook fast enough, so I took it out and cooked it in batches.
Super yummy served over rice with the sauce!
If you’re doing a small batch just for your family, you can also add some veggies with it. The sauce makes it like a teriyaki bowl!
Kalua Pork
Kalua Pork has to be one of my most favorite recipes for feeding a large group. I love it for my family, too, but the expense and ease of it make it one of the best meals for those large gatherings of people. Here’s what you’ll need:
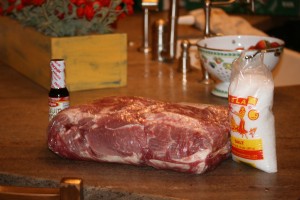 Pork Shoulder Roast about 12-15 lbs. (I get mine at Costco), Aloha salt (can usually get it at Walgreens or Longs Drugs), and liquid smoke. Yep….. three things! You’re liking this already aren’t you? (If you can’t find Aloha salt, don’t panic, just substitute kosher.)
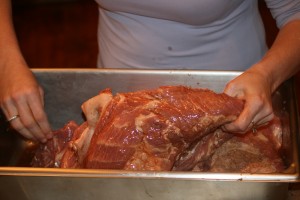
Pour your liquid smoke on your roast and massage it into the roast. You will flip and turn your roast and pour a little more. You will use about a 1/2 a bottle per 12-15 lb roast. So pour and rub it in until you have the whole roast covered well.
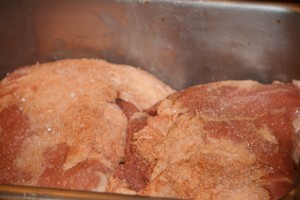
Then do the same thing with your salt. Sprinkle it on and rub it in. You will use about a 1/2 a cup for this large roast. I know it sounds like a lot, but trust me. ;o) Can you see the salt on there all massaged in?
 Here’s an up-close view of the salt and smoke all rubbed in. Now to cook it, you can just put it in your crock pot for 11 hours on low. It is important to cook it slow and low. The meat will just fall apart!
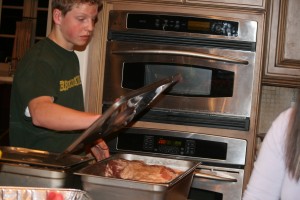 When I shot these pictures, we were doing my son’s Eagle Scout Fundraiser and had a lot of these roasts to cook, so we had about 2-3 of these roasts in these big pans and put lids on them and cooked them all night in the oven. If you zoom in, you can see we had the oven set on 200 and let them cook all night. I’ve also used my roasting ovens. If you want to put them in the roaster, then wrap the meat in tinfoil, put it in the roaster and pour water to half way up the meat and set it on 200 and let it cook all night or all day, too. Then you can slip the meat out of the tinfoil. If you’re using the roaster, you will have to check it periodically to make sure that that the water doesn’t totally evaporate. You may need to add some. The advantage is that if you cook it in the roaster, then you can just shred it right in there. I use it when I have a couple of roasts to cook and am serving it and need to keep it warm. The crock pot works best if you have a small 5 lb roast you are feeding your family with.
After the meat is done cooking, just take your forks and shred it. If you’d like to extend the meat a little bit or do it real Hawaiian Style, then throw some cut up cabbage in it after you shred it and let it cook a few minutes longer. Yummy either way!!
I forgot to get pictures of the end result. It was a big day. ;o)
Peach Soup
I LOVE LOVE LOVE this soup. Years ago, I went to a fancy restaurant in town that served COLD soup. Being a picky eater, I nearly didn’t try it, but I’m GLAD I did. It was plum soup. So delicious! I’ve tried to figure out that recipe for years, so I was glad when I found a peach soup recipe. I tried it, then I tweaked it to the way I liked it and now I am the happiest girl ever when peach season rolls around….. and slightly depressed the rest of the year, because I am such a lover of fresh peaches! I can’t get enough of them! So enough about my relationship with peaches….it’s seasonal. ;o) Here is the recipe I came up with.
Here’s the ingredients: fresh peaches, sliced or quarted; orange juice, peach nectar, plain yogurt, sour cream, sugar, and almond extract.
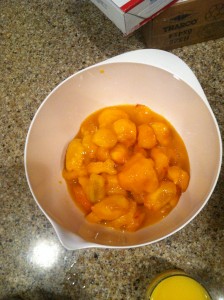
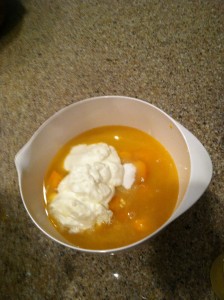
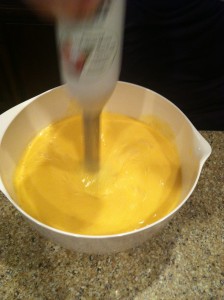
Put your 3 C of peaches in a bowl or a blender. (I like to use my immersion blender, so I use a bowl.)
Dump in the rest of your ingredients: 1/2 C Sour Cream, 1/2 C plain yogurt, 1/2 C orange juice, 1/2 C peach nectar, 1/4 C sugar and 1 t Almond Extract.
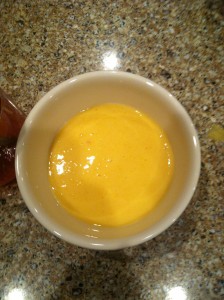
And then blend until smooth. Adjust the sugar to taste. If you have really sweet peaches, you won’t need more. If they’re not as sweet, I’m sorry. ;o) You can add a little more sugar, though, if you’d like.
Then you can chill it in the fridge until serving time. If you are serving it to royalty or for the prom or to impress others (and you will!), then I’ll show you how to make a cute raspberry flower in it.
Pour that deliciousness into a pretty bowl. This is corel…. the final picture I’ll post is a pretty pewter bowl.
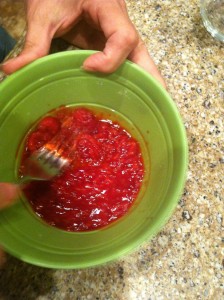
Put some fresh or frozen, but defrosted raspberries into a bowl and mash them up.
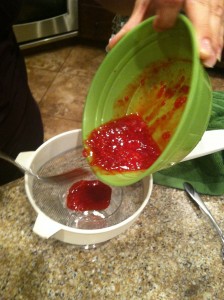
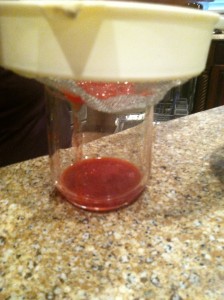
Then put them in a strainer and strain the seeds out, leaving just the delicious raspberry pulp.
After you’ve strained the seeds, put a little sugar in to taste.
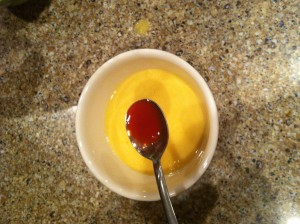
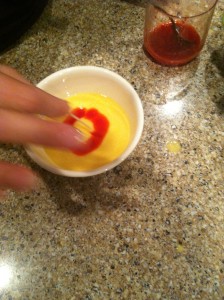
Okay, I’m using a spoon for this example, but I recommend using the squirt bottle (I’ll post it here in a bit) to do this because it is easier and looks better. But you are going to take your spoon and drizzle a circle in your soup.
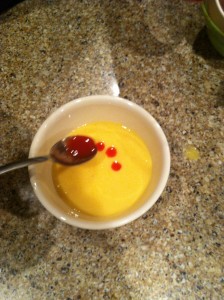
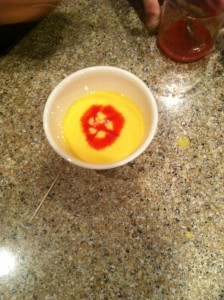
See, it’s kind of a thick circle. The squirt bottle makes it thinner and nicer looking. After you get your circle done, then take a toothpick and starting from the outside edge of your circle, drag it to the center, creating a “petal.”
When you’re all done, it will look much better than this because the circle is so thick. Then after you have made your petals, you put a dot in the center and it looks like a cute flower.
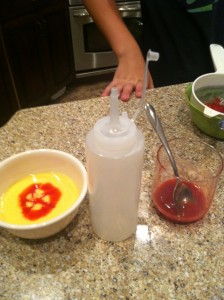
Here’s a picture of the squirt bottle (and my son’s hand). We aren’t too professional around here. We just want things done! ;o)
And here’s a picture of one done up right purty for Homecoming last year. This was done with the squirt bottle. Much more control. And yes, that’s a sword….we were on a pirate ship, for Heaven’s sake. You can read about it and see pictures in the link above.
So there you have the purty peach soup. One of our all time fave’s around here!!
Here’s the easy-to-read version:
3 C peeled, quartered or sliced peaches
1/2 C Sour Cream
1/2 C plain yogurt
1/2 C Orange Juice
1/2 C peach nectar (I find these in the hispanic food section)
1/4 C sugar
1 t Almond Extract
Blend all ingredients together. Can add pretty raspberry flower, if desired.
I always double this or triple. This batch is not enough for us. =) Let me know if you tried it and how you like it!
St Patrick’s Day Dinner– Lite Version
I like doing Holiday dinners for my family just to make things a little more fun and breaking up the meal monotony. For St. Patrick’s Day, I always do some kind of a “green” dinner. I have done the traditional corned beef and cabbage. The kids don’t like it too well, but I think it’s pretty good if you cook it right. Here are some “green” things I do to go along with it:
Green jello
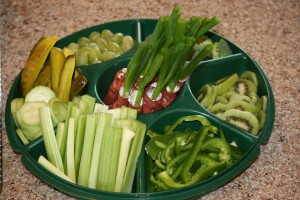
Green Veggie Tray
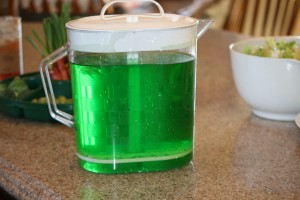
Green kool-aid OR
Green sherbet with Sprite
Green Salad
Last year I did a “lite” dinner because we didn’t want the corned beef and cabbage thing. So here is what I did:
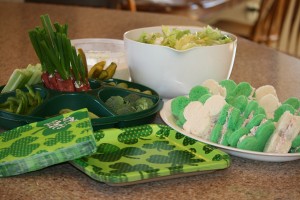 This included Zucchini Bisque Soup (it’s YUMMY!), Green Salad, Green Veggie Tray,
Shamrock Corned Beef Sandwiches (recipe to follow) and
It was a fun, lite meal that we could all enjoy!
If you are looking for cute breakfast ideas, I found these two:
 This one. Click HERE for link.
And THIS one. Aren’t they darling? I may try one of these this year. I really like the rainbow fruit idea! Usually it is best for me to do a dinner, though, so I have a little more time to prepare it.
Here is the recipe for the cute Shamrock Corned Beef Sandwiches:
The first thing you need to do is to remember to order green bread from your grocery store bakery the day before you make them. Then you can pick up your fresh green bread on St. Patty’s Day.
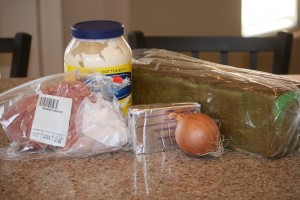 You’ll also need some shaved corned beef from the deli, cream cheese, mayo, and an onion.
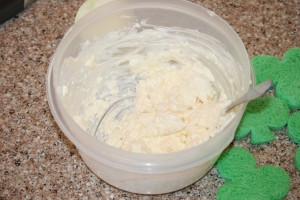
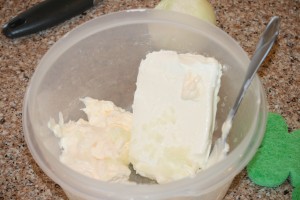 First, put your softened cream cheese and some mayo into a bowl with about 1-2 teaspoons of grated onion. I can’t remember if I put any other seasonings in here. I think the corned beef is quite salty, so I didn’t. But if you taste it and it seems a little bland, then add a little bit of seasoned salt to it.
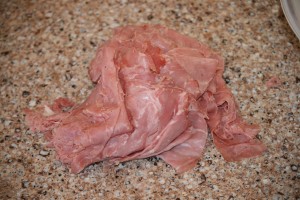 Next, take your shaved corned beef
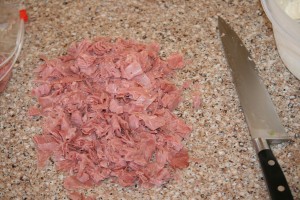 And chop it up. Add it to the cream cheese mixture and your filling is ready.
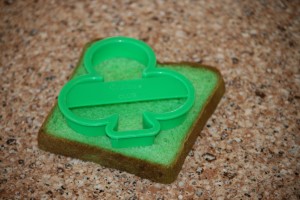 Then take your shamrock cookie cutter and cut them out of your green bread. I also did white, too, for some color variety.
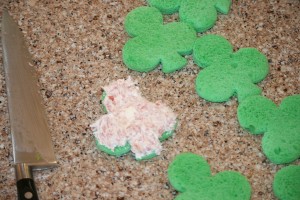 Spread your filling on your shamrock and top with another slice of shamrock bread.
 And there you have these cute little shamrock sandwiches!
 And your nice light St. Patty’s Day Meal is complete! Soup, Salad, Sandwich and some side veggies and fruit!
Have a great St. Patty’s Day dinner!

