Coloring Easter Eggs is one of our family’s favorite traditions and activities. According to my grandma, they have been coloring eggs this way in Santa Clara for as long as she remembers, so we assume the tradition came over from Switzerland with the pioneers.
It’s a pretty easy and fun way to color. You want to give yourself plenty of time to do it, though, so you can relax and have fun with it. Maybe it just takes a while for our family because we all want our own dozen eggs for the Egg Bust (Read about that here.)
So here we go……
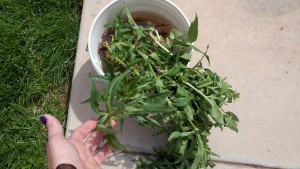
The first thing you have to do is gather up all your brown onion shells. You can get these from the grocery stores if you don’t remember to save yours during the winter months. You also have to dig up some red root. Red root looks like an obnoxious weed that you’d dig up. They grow wild along the ditch banks here in Santa Clara, but since they got rid of our ditches and went to a city water source, we have to track them down in the fields. Here is what they look like:
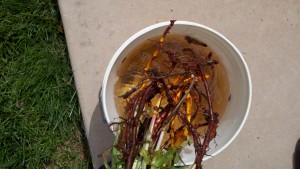
And here are the roots
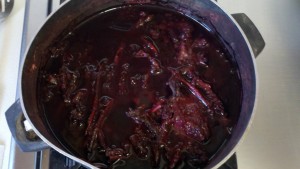
You can see how they are reddish in color. You have to take the roots and wash them really good with the hose to get all the dirt off. Then grandma usually takes a rock and smashes them a bit. I kind of twisted mine to break them apart. Then you put them in an old pan and put water in them. These pans we use are grandmas old pans that we have used for years. They are only used for eggs, so if you have an old pan you want to throw out, save it for Easter eggs. =) Here is the pan of red roots covered in water. You need to start them simmering for a while to bring the color out of the roots.
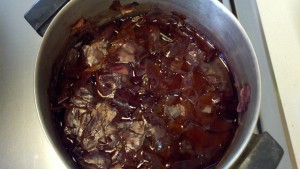
Here is the pan of onion shells. You’ll need to put quite a few in. Cover them with water, as well, and start them simmering to get the color out.
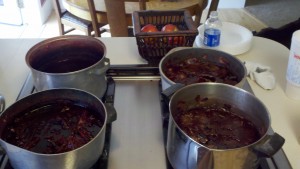
You can get your pots ready a day or more ahead of time if you’d like. Just keep them refrigerated after cooling. Or you can just simmer them while you are wrapping your eggs. We pass these pots around to the whole (extended) family. We all take turns using them and coloring our eggs on different days.
Because we color so many eggs, we have two pots of each going at the same time.
Now to color the eggs:
Before you start coloring eggs, you have to gather up your weeds, flowers, and leaves. We give all the kids a grocery bag and send them off in search of these items. Things that color nicely are peach tree leaves, dandelions, the dried shriveled up iris blooms, holly hock leaves, lilacs, carrot fern, etc. We just wander through up and down our street and pull a few leaves off any trees, bushes or plants we walk by. We try not to take too many if we are pulling them off neighbors property and we never take flowers from our neighbors. Weeds make some of the best designs, so if you find an open lot or such, getting weed leaves and tall grasses are good to color with as well.
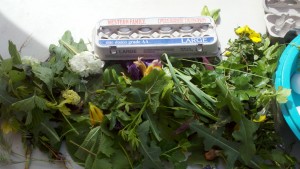
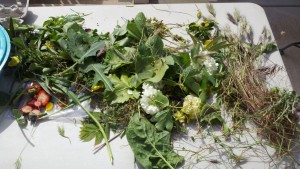
Here’s our layout of weeds, leaves and flowers:
You can see that we decided to try some strawberry tops this year. They actually colored nicely. The foxtails leave a neat imprint and so do those snowball flowers off my uncle’s snowball bush. =) I like using the really big holly hock and ivy leaves. Then I can wrap a whole egg in them. They really color pretty.
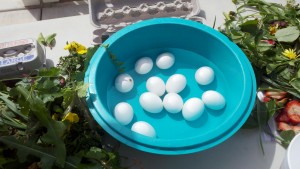
With the leaves spread out, we put our eggs in a bowl of water. The reason we do this is because we found the leaves stick on them a little better if the eggs are wet.
The eggs will dry quickly, so you can just dip your leaves in the water to keep them sticking. As soon as you get all your leaves, weeds and/or flowers on your egg, you take your spool of thread and start wrapping. Here are a few tips. It helps if you have all different colors of thread to help keep track of your eggs somewhat. When you start to wrap, first tuck the thread under your thumb where you can hold it as you wrap your egg. You need to wrap the egg tight, but not so tight that you break the egg. You’ll get used to the tension amount as you keep doing it. The last trick is to just let your thread go and fall if you need to. You can gather it up off the ground when you finish your egg.
When wrapping your egg, you want to wrap your thread around the ends and edges of your leaves and petals so that it will leave the full imprint. If you don’t, the water seeps underneath them and you can’t see the outline. Here is a video where my family is wrapping their eggs. You will notice that once we get them wrapped, we just bite off the end of the string. Demonstrated beautifully by my hubby. =) The political discussion is a bonus. ;o)
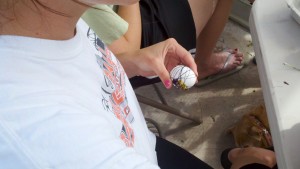
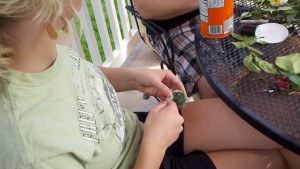
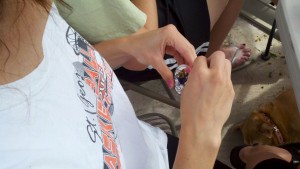
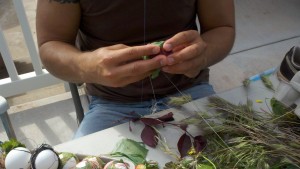
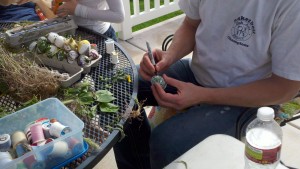
Here are some pictures to show you more wrapping. Remember to use the black sharpie to put your initials on them, cuz if you don’t EVERYONE will claim the prettiest eggs as theirs. ;o) (Not that that has ever happened before at our house.)
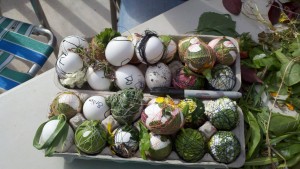 Here’s a bunch of eggs wrapped and ready to boil. You can see the ones done with loose thread and only wrapped in one direction. Most likely, that thread will fall off during the cooking process and they will have a plain egg. These would be the younger kids’ eggs or my impatient boys who could care less how they look.
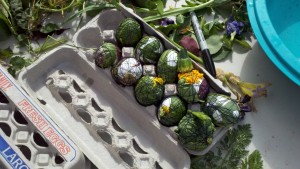 Here’s some that are wrapped more correctly. You can see how the thread goes in all directions, laying the leaves and flowers down to get the pattern.
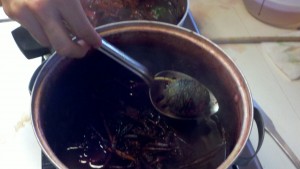
Now we’ll cook them. You’ll notice in the video how my sister is making a little hole in the pot to put the egg in. She will move around the pot, creating spots for the eggs. You may have to add water after a few batches to make sure the water is covering the eggs. If you do it in between batches and let it cook a little more, then you won’t weaken the color. Often we notice it as we are putting eggs in and add water. The dye will be a little lighter on those batches when we do that, but that is okay, too, because it gives you different shades of purple/pink and orange/brown.
Once all the eggs are in, you set your timer for 20-25 minutes. They need to simmer, not boil. If the water is boiling, it will crack the eggs, so you just want them to cook on a nice lower temperature. Make sure you set the timer so that your eggs boil all the way. If you don’t then you have runny eggs at the egg bust and that is not only gross, but embarrassing. (Not that we’ve ever done that before, either!) ;o)
When the eggs are all done, gently use a slotted spoon to lift them out.
Get a bowl of cold water and put next to your pan to put them in.
Then you will place the bowl of eggs in your sink. You will grab the loose threads in the water and gently pull on them as demonstrated in the video below. Have the garbage or a bag close, as you will throw away all the thread and cooked weeds into the garbage before dumping the water out.
You can see that you only put a few eggs in the bowl at a time or have plenty of water in there so they don’t hit the other eggs and crack.
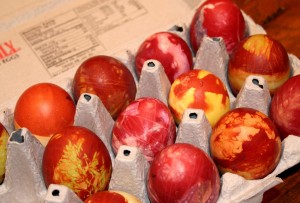
At our house, we then take the empty cartons and write everybody’s name on them. When we get them unwrapped, we look at the initials and put them in that person’s carton. As I stated before, we like to each have a dozen eggs to use at the egg bust.
The last step is to shine the eggs. You can get a little square of cloth or some paper towel and rub it in some shortening. Then you rub the egg to make them shine. Here is the video below. And yes, I used real butter. Not the cheapest way to do things, but it was all we had and no one could run to the store because we were wrapping/cooking/unwrapping. It’s a process that we love!
I apologize for my lovely nail polish. Evidently a manicure was not in my plans. At the end of the video, I show you a few of the designs that the leaves have left. (And you get to hear some awesome discussion in the background of each video. I hope you enjoyed that, too.)
And there you have it! Beautifully colored Swiss Easter Eggs!
I will say that one year I wanted to experiment with other natural dyes. I tried purple cabbage, tumeric or saffron, and green onion stems. I remember one year, one family used pecan shells and got a really pretty brown color. What I found was that it the other dyes didn’t color as well as the red root and yellow onion shells. The green ones were either too light, or colored similar to the leaves, so it was harder to see imprints. The cabbage was not dark enough– too pale. The yellow was also different either too pale or blended again with the leaf colors, so it didn’t imprint well. If anyone has any other suggestions for natural dyes or what they like to use to color with, I’d love to hear about it!
I hope you all enjoy coloring some Easter Eggs in a different way this year!


We do this too as a tradition…so fun!!